How to start an online store in India for your Fashion and Apparel business

Are you thinking about starting an online clothing business in India? If your answer is yes, then you are making a great choice. Starting an online clothing business can be extremely lucrative as there is a huge demand for kids, men & women apparel with varied styles & sizes.
The clothing business future is bright and has no signs of slowing down in the future. Online clothing stores allow you to work at your own pace virtually from any location without being at the store physically.
This trend is gaining traction among eCommerce organizations and has benefited a number of fashion-related enterprises. With a proper plan, anyone can set up an Online Clothing Store in India.
Crucial steps to start an online clothing business in India
First, the entrepreneur needs to open a current account at a bank of their choice. This step does not involve any cost. Then, the online fashion business has to be incorporated and a GST certificate has to be obtained. This can be done by the entrepreneurs themselves, but it is easier to hire a consultant who can perform the task for Rs 5,000-Rs 8,000 (inclusive of incorporation fees of around Rs 2,500 for a sole proprietorship). A trademark can also be obtained for Rs 4,500 for a sole proprietorship ecommerce business. While this can be done by yourself, a consultant can file it for a fee of Rs 2,000-Rs 5,000.

Step-by-step to start an online clothing store
Step 1: Sign up on Shopify to start an online store
Sign up on Shopify with an email address you’d like to use for managing all your admin tasks related to the store.
Set a domain name that is the same as the name you went by offline.
For instance, if your brand is called XYZ, your domain will look like – www.XYZ.com.
You can go into personalizing your domain name later on, which is also covered in this guide on how to start an online store for your clothing brand.
Step 2: Design your store
Your first step in getting your store ready is to customize your store design. By default, you will have a theme set for your store. But, we need to ensure that your theme suits the kind of products you are selling and that it reflects your brand. Here’s how to start an online store with a design that truly reflects the story of your brand:

1. Pick your theme
You need to first pick a theme that suits you and the products you are selling. All themes that are built for fashion stores can be found here.
Here’s how you can start exploring themes:
On the Shopify dashboard, click on ‘Online store’. On this page, you can choose to explore all themes available on Shopify or just the free themes.
We have a few suggestions to help you simplify your search for the right theme:
- Minimal theme: A clean design that focuses on product images and prioritizes on functionality.
- Brooklyn theme: Add some character with a wide header image/video and a sleek design.
- Modular theme: This is a paid theme but allows you to bring out your personality, with product highlight sections that are sure to grab shopper attention.
Here’s a glimpse at what the Modular theme looks like for an online clothing store:
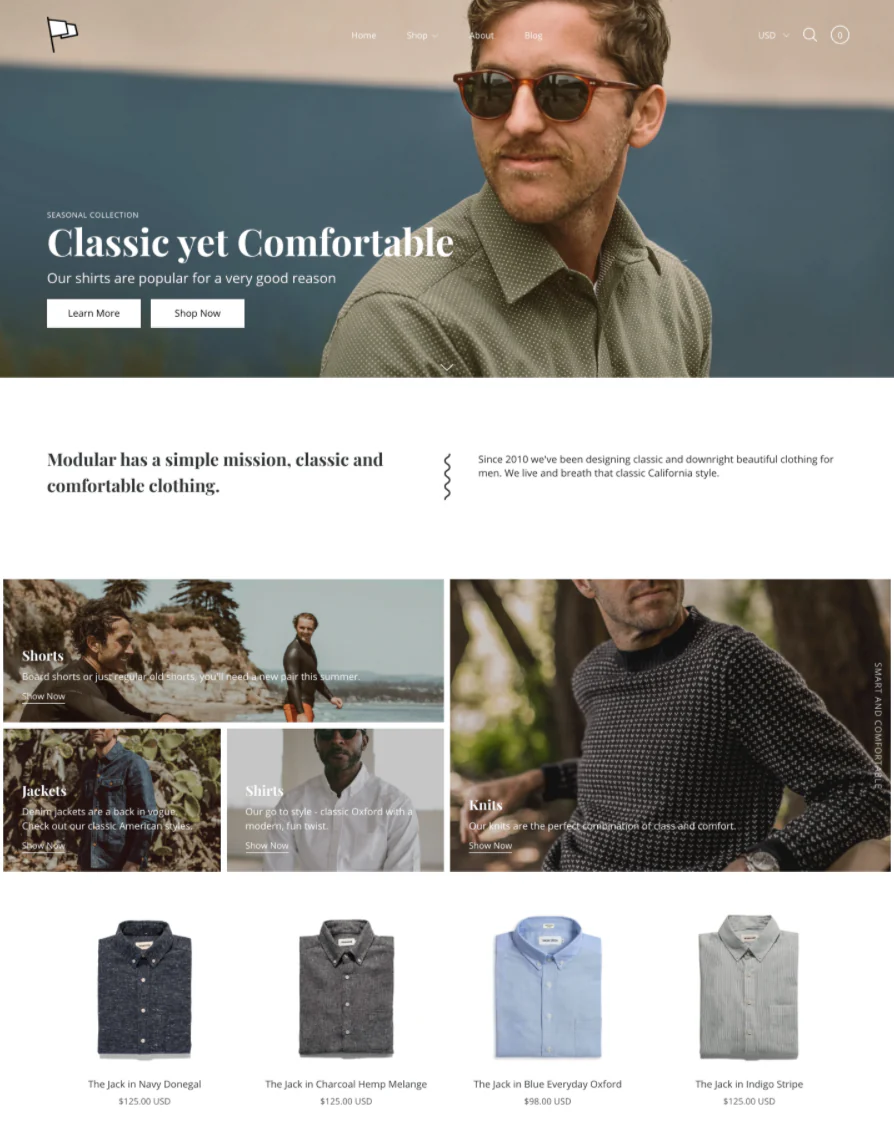
theme’ and the theme will automatically be added to your store.
Note: The theme works as a basic framework of your store’s design and you can customize it to suit your style
2. Add important pages
Next, you need to add relevant pages like your brand’s About page, Shipping information, Privacy Policy, etc. Here’s how you set up a page:
- Click on ‘Pages’ under ‘Online Store’.
- Here, click on the ‘Add page’.
- Name the page, add content according to what you want to show, edit the searching engine preview including the page URL.
- If you are setting up a ‘Contact’ page, select the template dropdown and click on ‘page.contact’ to add a contact form within the page. The contact form will be shown under the content you have added to the page.
- Click ‘Save’ once done.
Here is a list of pages we recommend in our guide on how to start an online store for success:
- About page: Explaining your brand, your values, etc.
- Contact page: This page can allow shoppers to reach out to you for help.
- Privacy Policy: This is a statement or a legal document that states how a company or website collects, handles and processes data of its customers and
- visitors. You can find a sample of it online.
- Shipping Information: Explain your shipping process, how long delivery takes depending on city, state, country, etc.
- Return Policy: Explain the terms and conditions for returning a product, how long it takes for refund, etc.
- Hygiene standards: Let your shoppers know what hygiene practices you have in place for your products and its manufacturing, packaging, and delivery.
Step 3: Adding products
Click on the Add Products button on the top right of your dashboard to begin uploading your products.
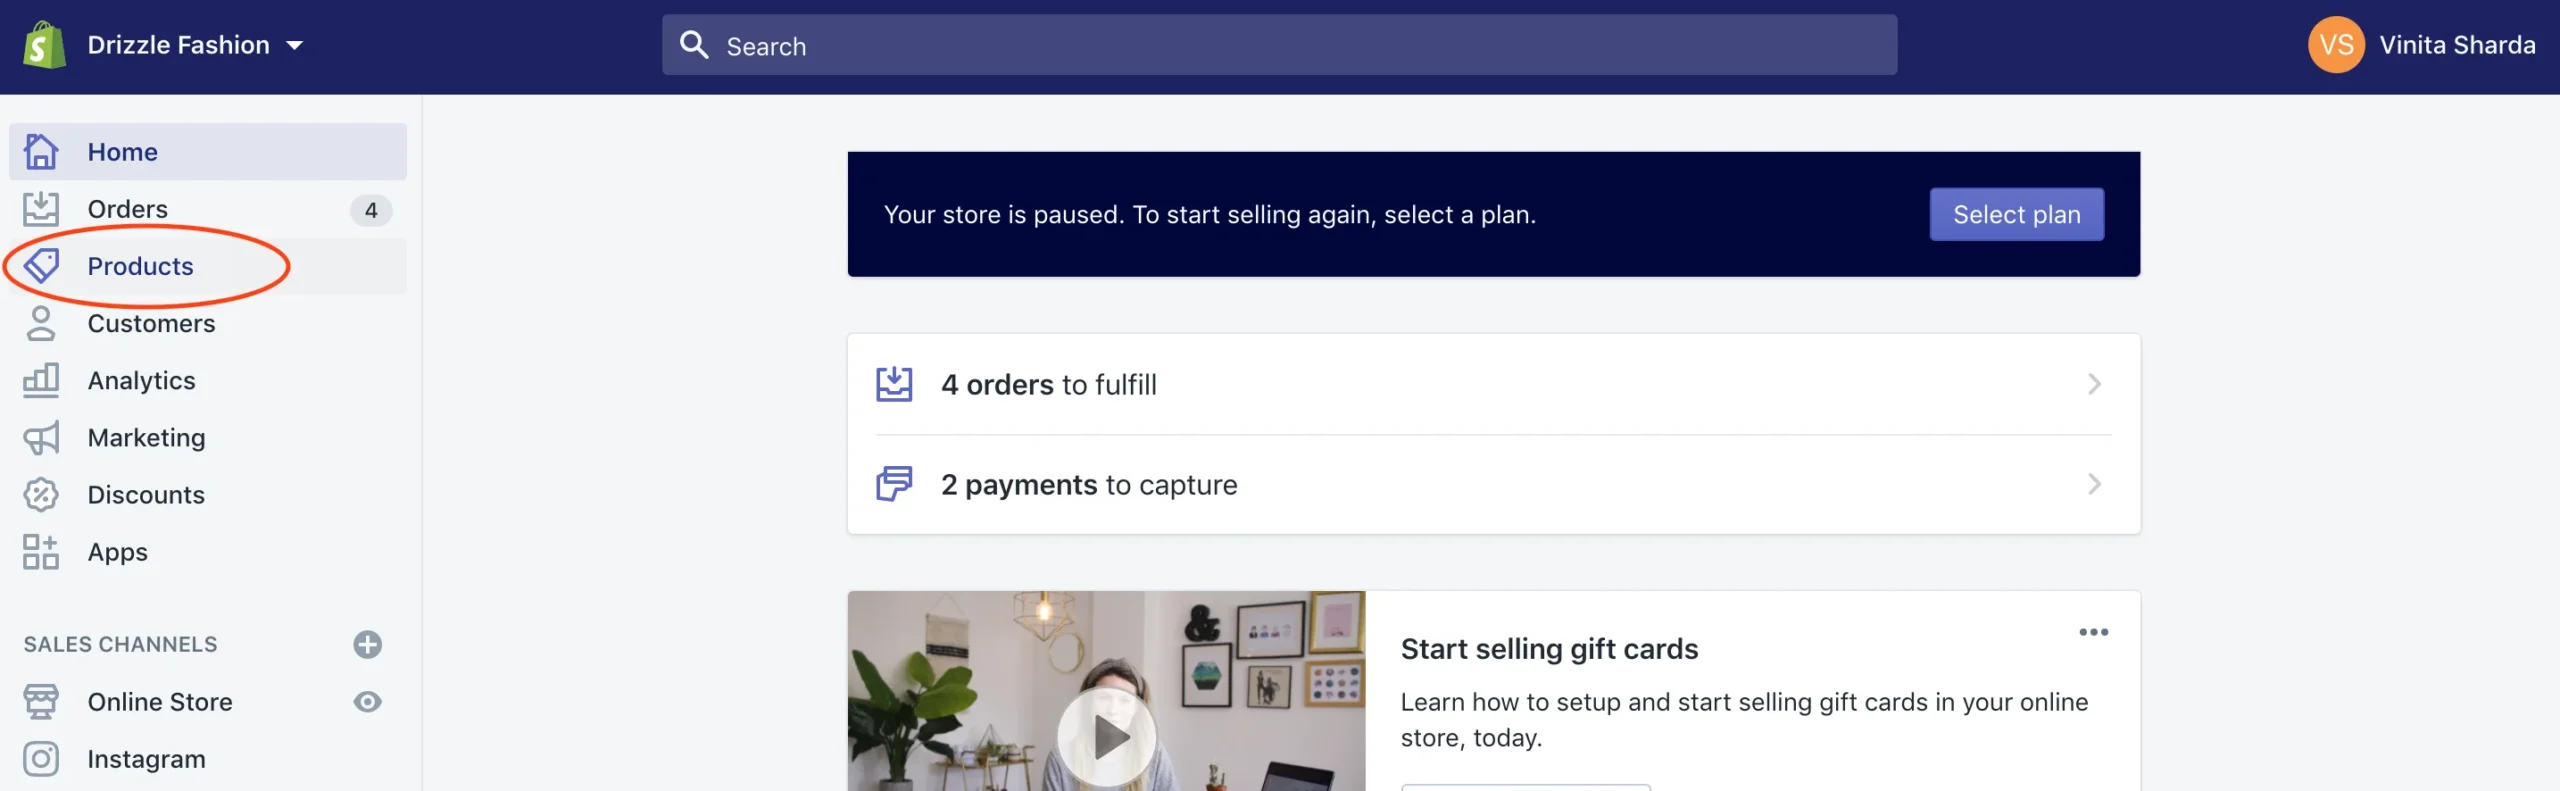
All your products have successfully been added to your online store!
3. Review images and optimize for SEOs
Lastly, you need to preview and check your product pages to ensure the product page URLs are optimized and short, images are clear, and your text has no typos.
You can do this by clicking on the ‘Online store’ on the left sidebar’ and selecting ‘Customize’ on the page that appears. Here, you can go through each product page on your store.
If you need to make any edits, click on ‘Edit this product’ within the editing sidebar.

Step 4: Assist in making the right purchase
Customers who are used to walking into your brick and mortar store to make a purchase will probably find it challenging to make the right purchase online. To deliver a great shopping experience (and reduce your return rates), you need to offer more assistance to online shoppers.
A few ways to do this include:
- Measurement chart – An absolute must-have is including a measurement chart on your product pages. Make sure that the top and bottom measurements are provided separately and as accurately as possible. If your sizes tend to run large or small, mention it in a quick note in your description.
- Live chat – Implement a live chat on your store to let customers reach out to you at any time with any questions they may have. You can even automate a few answers like linking them to a size guide or an article that describes the product details better using apps like Gorgias or Tidio.
- Product videos – Go beyond product images and include videos to give customers a better look and feel of your products. Shopify has a default feature to add product videos to your pages to make this easier. You can read about it here.
- Text on product videos – You can even use apps like Typito to add text on videos to make them more descriptive and self-explanatory, guiding the customer through different aspects of your product.
- Video calls – If your brand offers a high-end range of fashion products, you can consider offering support over video calls. This will ensure that your customers are making the right purchases and you get to earn brownie points for offering an experience worth the money.
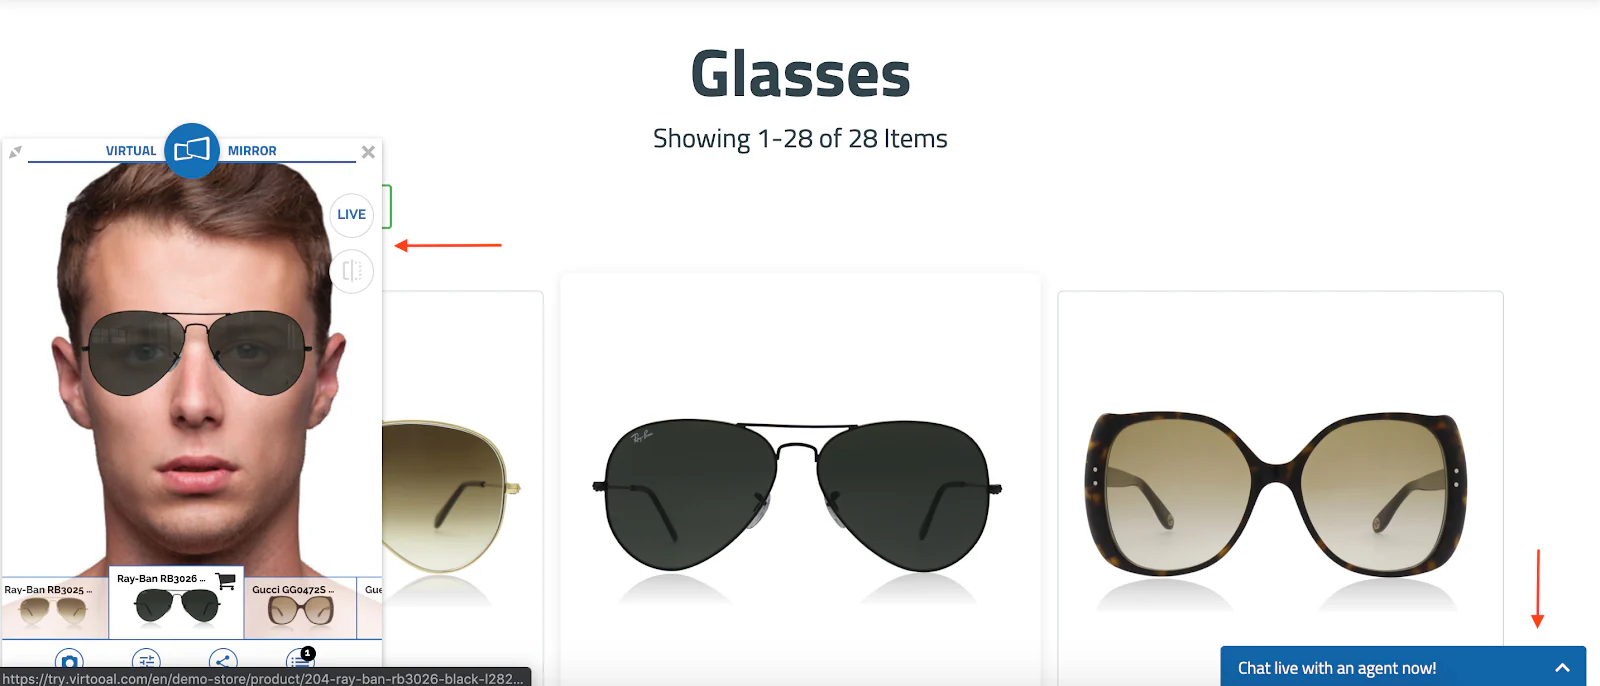
- Virtual try-on – It’s also a good idea to enable virtual try-on of your products. Similar to what you may have seen on sites like Lenskart. Virtooal has apps that can help you implement this on your store with ease.
Step 5: Customize your cart
This is the make or break stage of your online store. You need to ensure that your cart page clearly lists down the products added to it and its pricing. You also need to ensure that it is devoid of any distractions that might take the shopper away from completing the purchase.
1. Design customizations
Here’s how you can customize your cart’s design:
- On the Shopify dashboard, click on ‘Online store’. Within the ‘Live theme’ section, click on ‘Customize’ to give the theme your brand’s personality.
- Switch the tab to ‘Theme Settings’. Click on ‘Cart’.
- Choose your cart type— drawer or page. The drawer shows up within the page without requiring the page to reload.
- You can check ‘Order notes’ to allow shoppers to add special instructions.
- Once the design is finalized, click on ‘Save’.
2. Add payment methods
Set up multiple payment options to allow shoppers to choose the payment type they prefer. This makes it easier for them to complete the purchases online.
To add payment methods to your store, all you need to do is click on ‘Settings’ and select ‘Payment Providers’.
Shopify supports all the popular payment methods in India – including cash on delivery. You can take a look at all our payment gateways here.
3. Include shipping fees
Add shipping prices so that it gets automatically added to your shopper’s order.
- On the Settings page, click on ‘Shipping’.
- Click on ‘Manage rates’ and scroll down.
- Edit the prices for different kinds of shipping according to the costs you bear for shipping.
- Click ‘Save’ once done.

4. Customize checkout processes
On the ‘Settings’ page, you will find the ‘Checkout’ page to allow you to customize different aspects of the checkout. You can choose to ask your customers to create an account when they check out, select what information you want to collect from your customer, etc.
Here’s a good example of a cart page from Lindsay Nicholas:

Step 6: Customize emails
You need to keep your shoppers updated about their order and it’s status. This can easily be done with transactional emails, which are automated, real-time messages sent to a user about their order. With this setup, your customer will instantly receive an email when the order is confirmed, shipping, delivered, etc. This keeps them informed, ensuring positive customer experience.
On the Shopify dashboard, you can set up and customize transactional emails. Here’s how you can do it:
- On the Shopify dashboard, click on ‘Settings’.
- Here, click on ‘Notifications’ to see a list of messages you can set up to be sent to your customer when an action is taken.
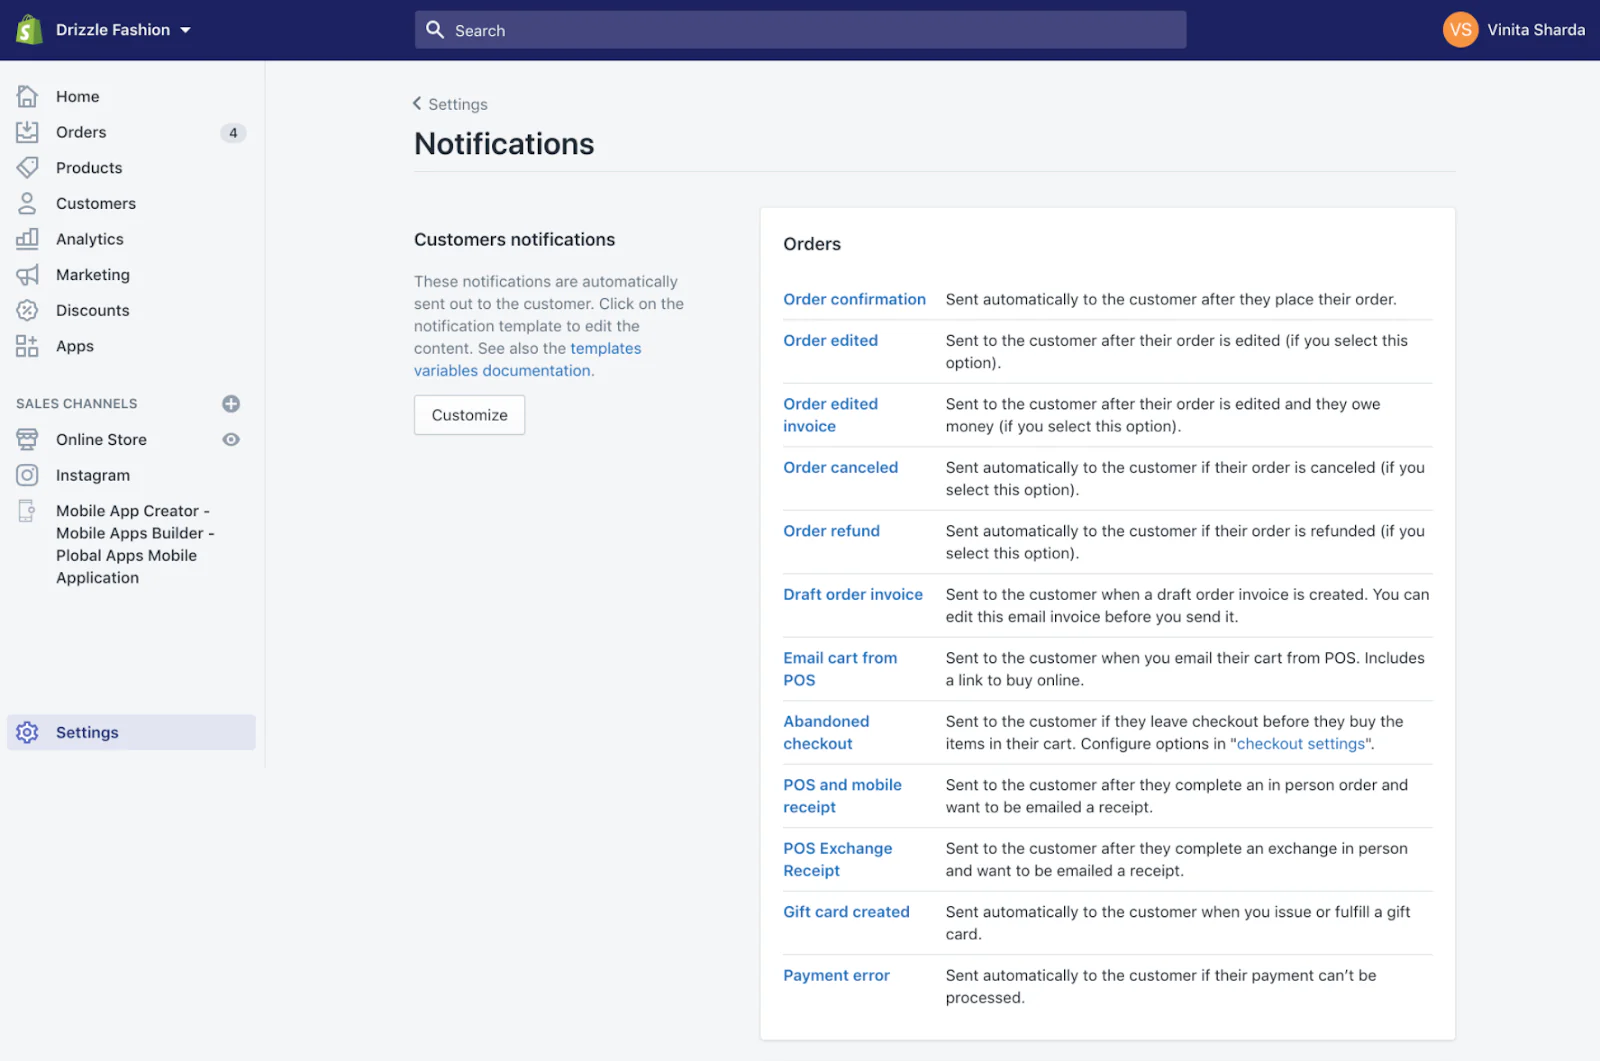
- Click on the Notification you want to edit. You can customize the text part of the email body— email subject, the text between {% capture email_title %}, and the text for email body that includes customer first name.
- Once you’ve edited your text, click on ‘Save’.
Step 7: Delivery
1. Partner with a delivery company while setting up the online store
Take a look at the delivery companies in your area that are operating right now. Based on what your products are, who your customers are and what delivery speed they expect, choose a partner accordingly.
Shopify India has integrations with all major delivery companies. You can find a partner here.
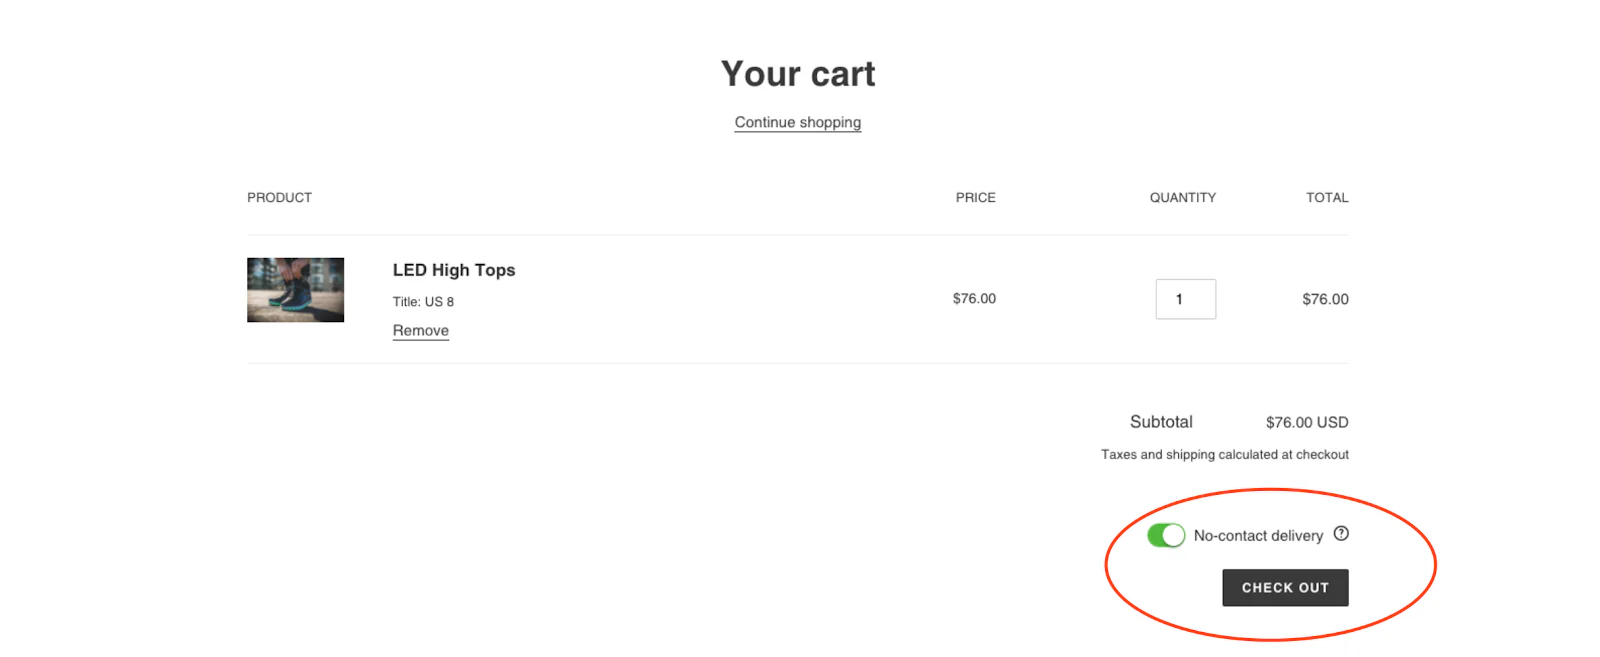
2. Add no-contact delivery on your store
It is important to provide a safe way for customers to receive orders without any contact with the couriers. A no-contact delivery option is also a way to safeguard those who deliver the orders.
You can offer this on your store easily with the app, No-Contact Delivery.
The app enables you to let your customers add more delivery instructions like leaving the order at the gate, door, or giving them a phone call one hour prior.
Additionally, you can also let your customers choose a date and time for delivery using apps like Order Delivery Date.
3. Keep the customers posted about the delivery
The next step is to keep your customers informed about their order status. This is especially important now as it will help them plan their next purchases accordingly.
You can do this easily by installing the app, AfterShip on your store.
While email and text updates on order shipping and delivery work well, you can also consider adding Messenger and web push notifications.
Step 8: Offer pick up at store
There are some localities in cities that are not allowing doorstep deliveries. Consumers have to go outside within a defined time frame to make purchases.
In this case, it’s a wise idea to also offer ‘pick up at store’.
Learn more: Checklist to set up your online store.
CTA Section
Looking to create an ecommerce website that builds trust, captivates visually, and drives conversions? If you’re in Mumbai, India, and need a custom Shopify design and development solution, your search ends here! Our team of expert Shopify developers in Mumbai, India, is ready to transform your ecommerce vision into reality. Get in touch with us today for a complimentary consultation!
More Related Links
Launch Your Online Store in 2024: The 15-Point Ecommerce Checklist
eCommerce Website Guide — The Anatomy of a Perfect Online Store
How to find the right shopify expert agency to set up your online store
Every online store wants to increase traffic and conversions.
About Author
 Meet Ritu, an expert writer in Shopify, ecommerce, and web development. Her articles provide insightful guidance navigating the online retail and web technology landscapes.